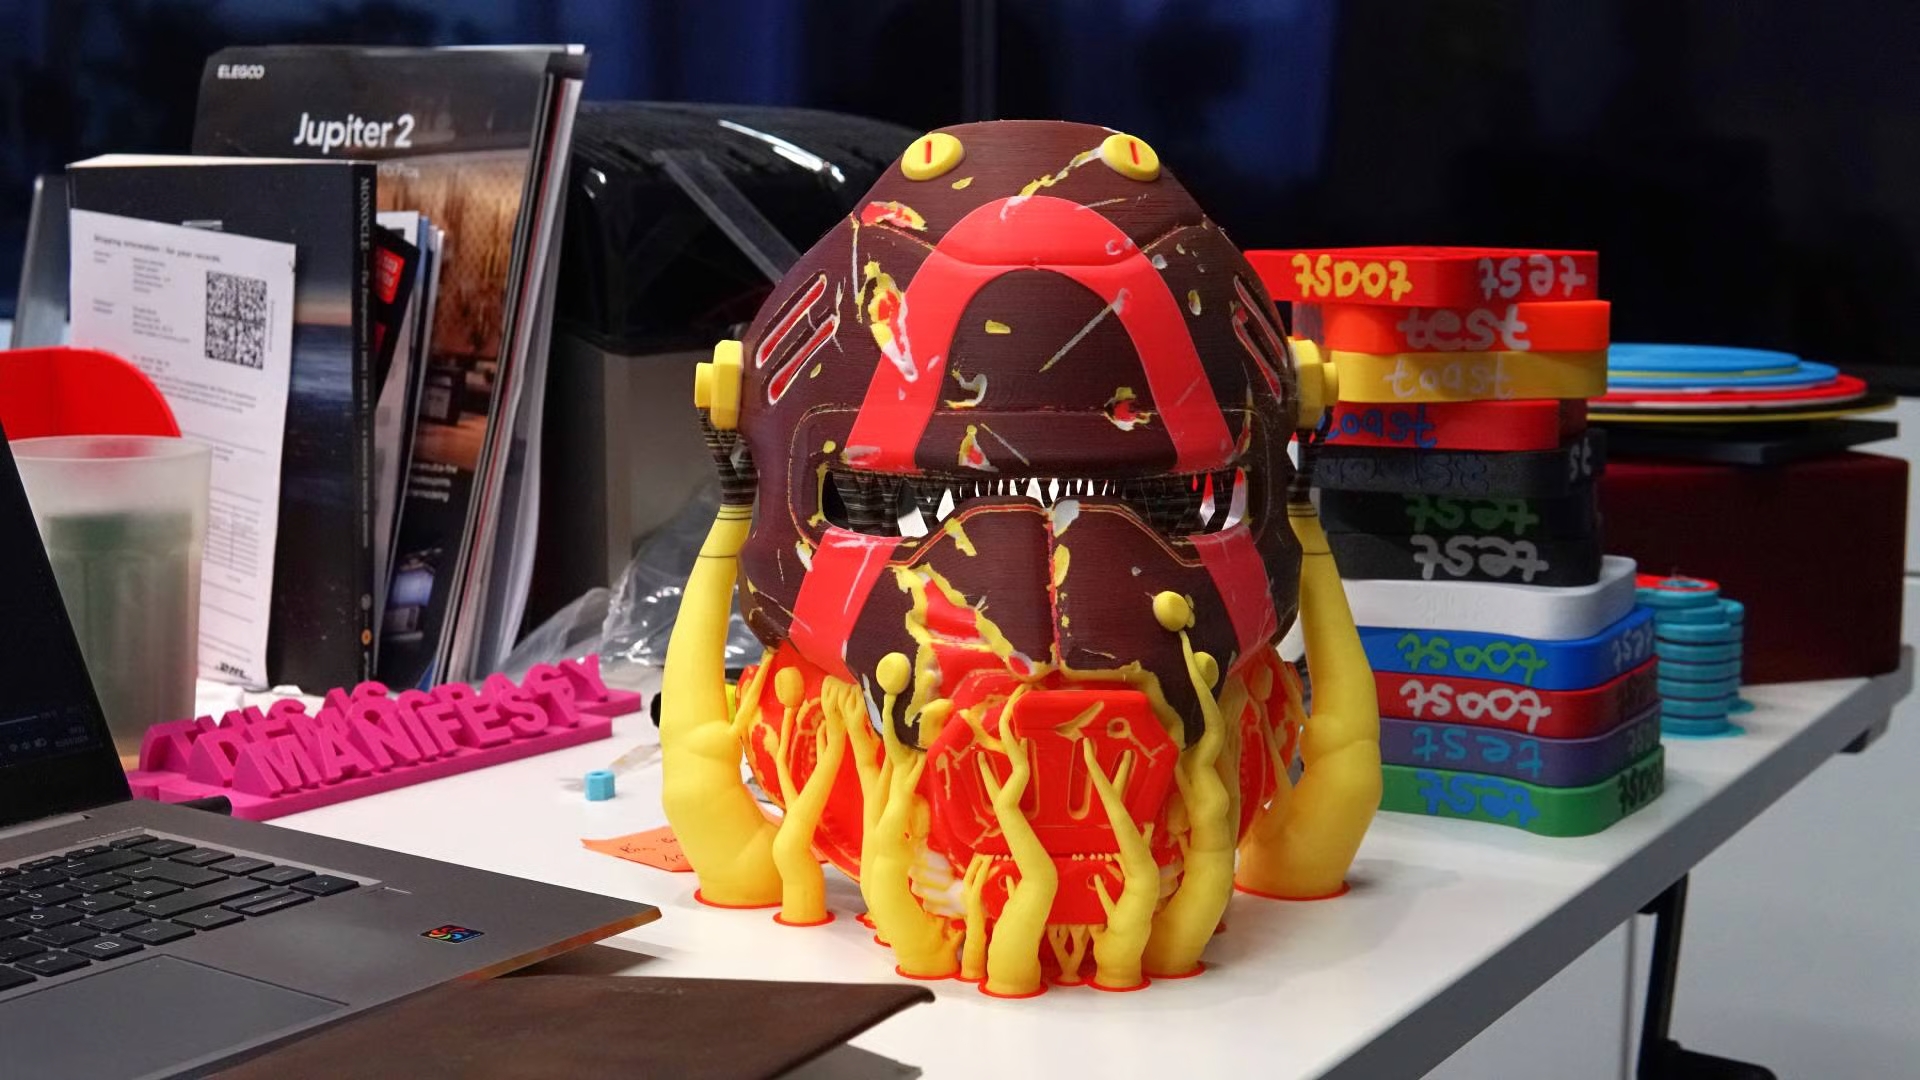
A project to explore layer mixing has resulted in Snapmaker Orca Full Spectrum, a slicer variant that introduces color-mixing functionality for theoretically limitless color 3D printing. I’ve tested it out and the results are astonishing.
There is no argument about 3D printing as we know it being all the better for the software ecosystem being open source. Positive changes, fixes and features all roll into a sum that’s greater than its component parts.
Occasionally, functionality-bending things like Full Spectrum pop up. It’s the manifestation of the thought many of you have probably had when printing multicolor prints: “Hey this prime tower looks kinda cool – some of the colors have mixed together”.
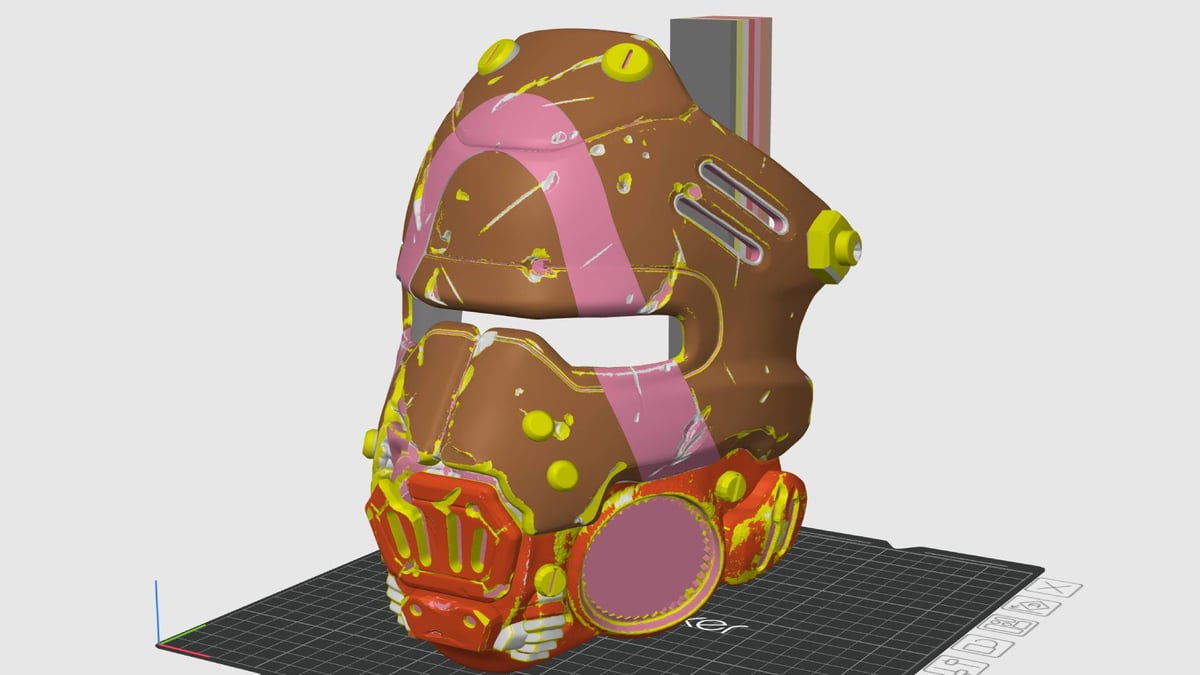
Full Spectrum takes that accidental, incidental color mixing and controls it, letting you paint your models with “virtual” colors that combine the printer’s available filaments. The feature is currently in development, but publicly accessible via a fork of Snapmaker Orca you can download from GitHub. For 3D printers like the Snapmaker U1, which Full Spectrum took as printer zero for developing the technique, that means taking its native, four filament capability as a toolchanger and adding virtual colors that mix any combination of the four.
These colors – the four base materials plus whatever number of combinations you set – are all available in the model painting tool, letting you paint subtle hue detail or invent all new colors for complex multicolor prints.
How Does It Work?
Pre-empting the thought: yes, you are correct, the Snapmaker U1 cannot physically mix filaments. Each toolhead is a single nozzle with a single filament path. The secret is that Full Spectrum doesn’t mix the filaments. It just looks like it does.
The lead developer, who goes by the pseudonym Ratdoux on GitHub, explains it better: “The useful concept here is often called Transmission Distance: if the printed layers are thin enough, or the filament is translucent enough, light can pass through multiple colored layers before reflecting back to the viewer.” It’s the same principle that allows vibrant, multicolor prints using tools like HueForge.” They continue “When that happens, the eye does not see only a red layer or only a blue layer, for example; it sees light that has interacted with both, and the result is perceived as a mixed color.”
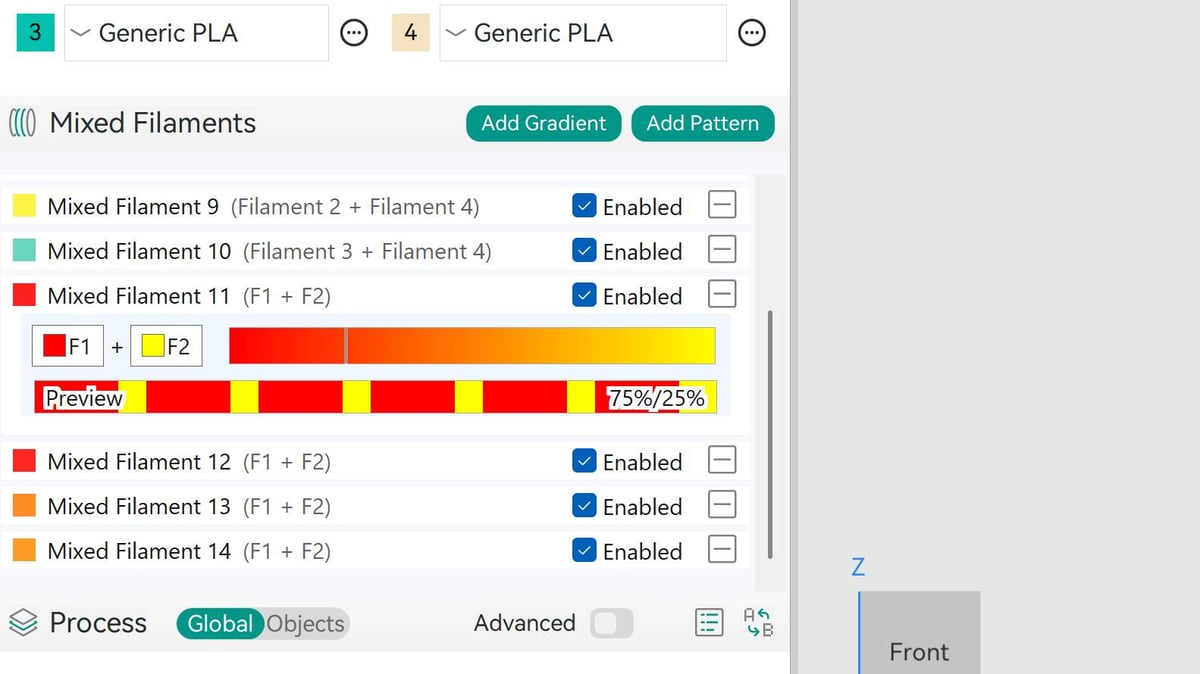
In the slicer this looks like an additional configuration panel between your filament controls and print settings. Here, you have the freedom to add a simple two-color mix, adjusting the weighting of each to push the new color in either direction. This is a “gradient” in the slicer. You can go more complex with a “pattern”, specifying more than two colors and controlling the order and weighting in which they print.
As with anything to do with the optics of color and transmittance in 3D printing, it’s a little more complicated than that.
They continue, “in software, the slicer treats each mixed color as a virtual filament. If the printer has N real filaments, the mixed colors are effectively added as extra filament IDs after the physical ones. Each virtual filament stores a recipe: which physical filaments it uses and in what ratio.”
What Color Flexibility Do You Get?
The default recipe for each virtual filament is a straight 50:50 split, alternating layers back and forth between them. “That recipe is what matters. The slicer does not start from an RGB swatch and try to reverse-engineer a pattern from the target color. Instead, it stores the recipe first, then uses that recipe to generate two separate outputs: an on-screen preview color for the user, and the actual physical print pattern that the machine will follow.”
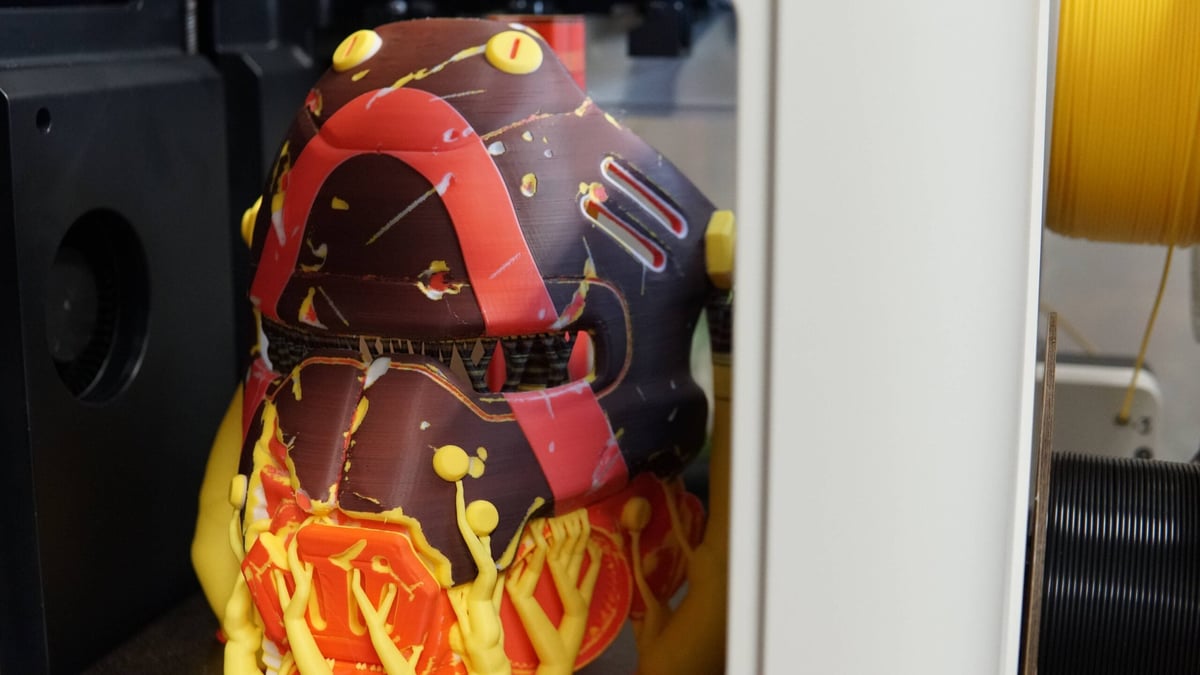
There’s an important distinction about how Full Spectrum behaves (and setting your expectations accordingly) – the virtual filaments as presented in the the slicer are simple midway analogs for the colors as your slicer depicts them. What prints is often quite different, needing a little color-savviness from yourself in judging things.
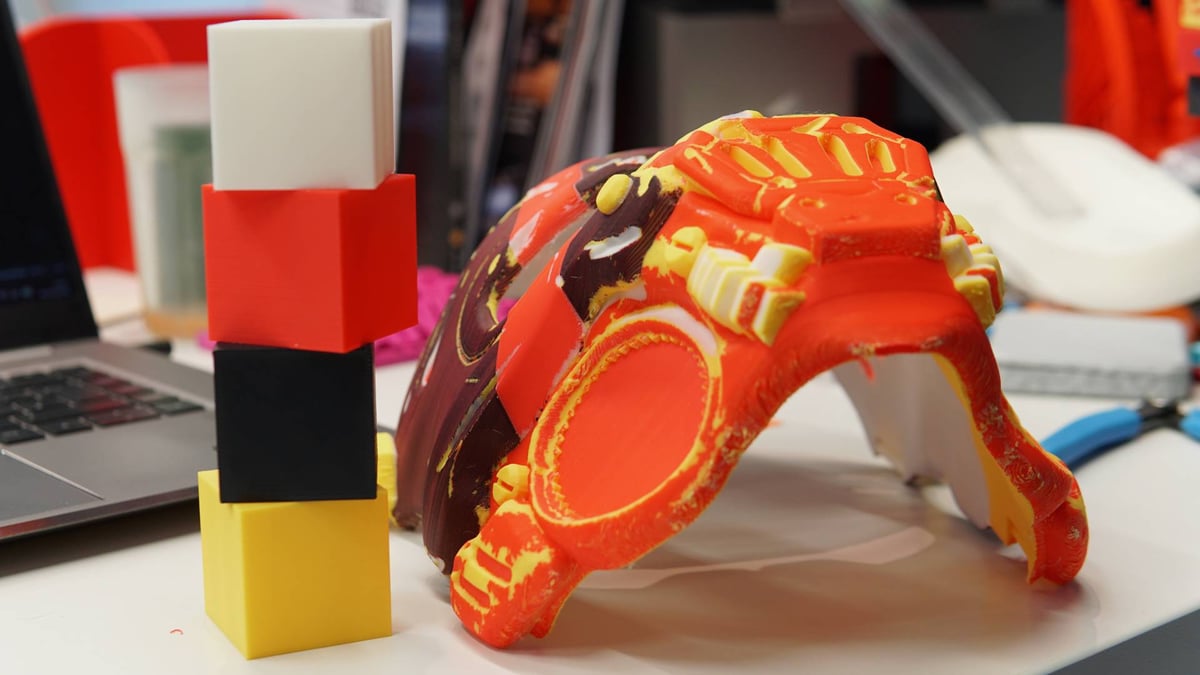
Some white filaments, for example, are more of a creamy “natural” color than others, lessening their ability to pitch a vibrant color down. The pink I aimed for in my big test print here is nowhere near the previewed virtual color. Experimentation is key.
From toying with the system over the last week or so, while it’s clear that there are some hurdles to overcome, even this most basic version is surprisingly stable, capable and effective.
While any printer equipped with a filament-changing system, such as Bambu Lab’s AMS or Prusa’s MMU, can theoretically do this, Full Spectrum as it is right now, is optimized for the Snapmaker U1. We have had some success exporting for the Prusa XL, though. Single-nozzle systems are an unknown for us, but we plan to try it out.
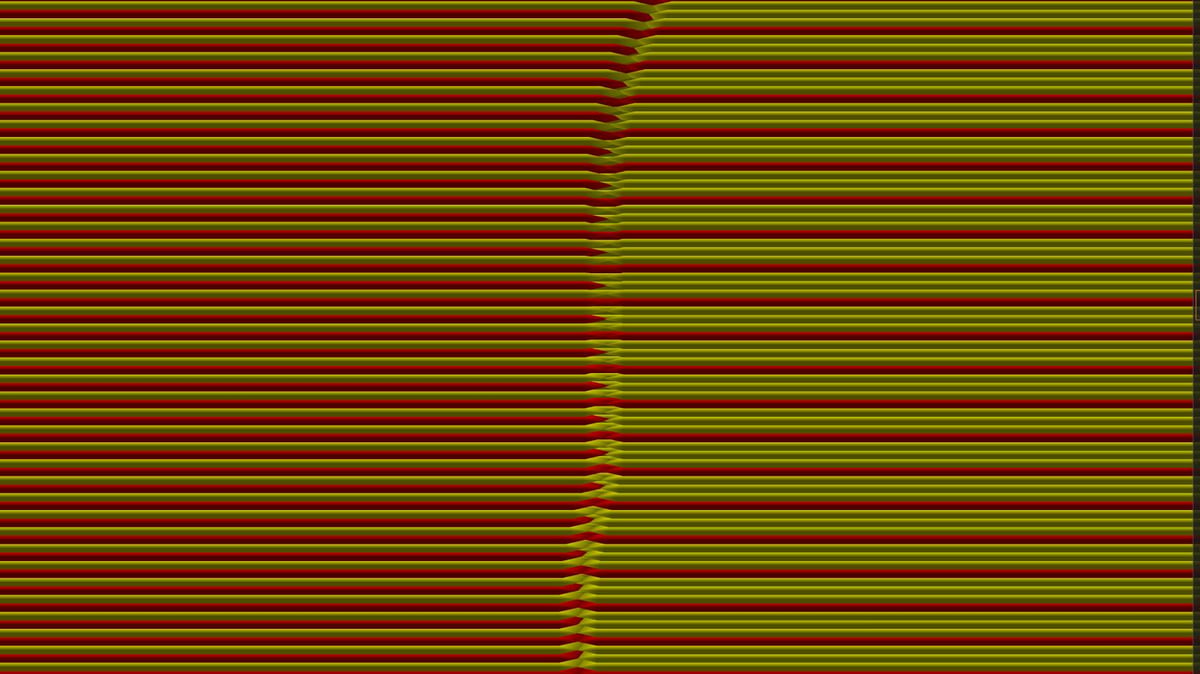
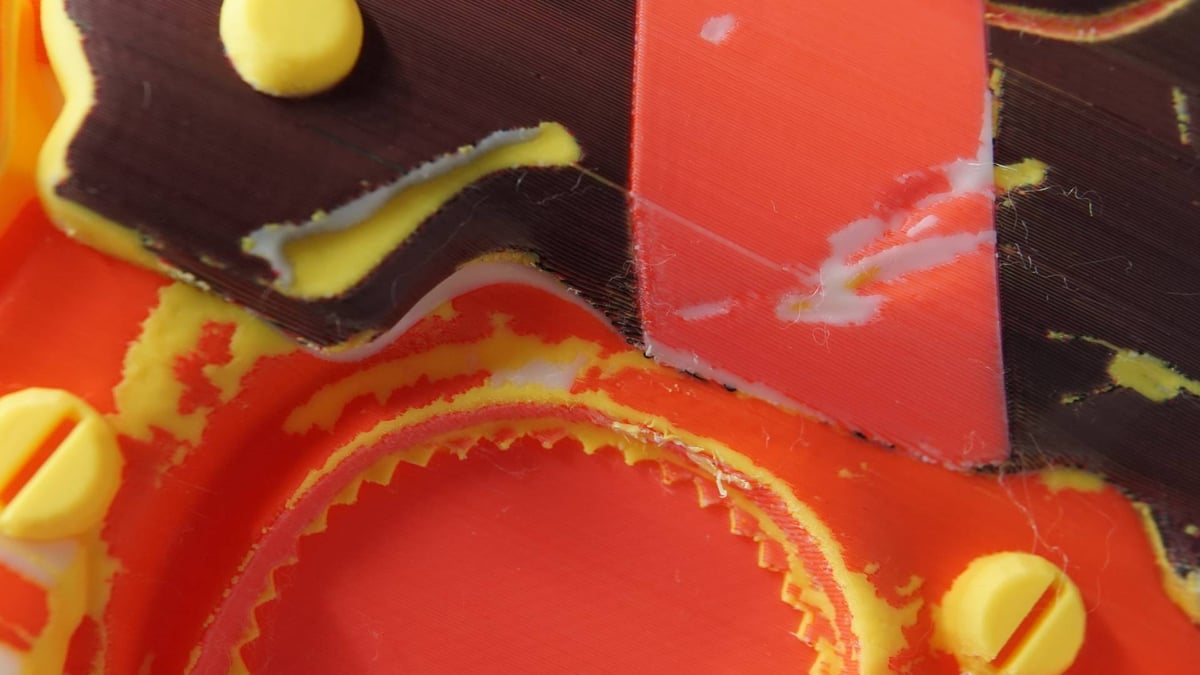
For one, the effect is only possible through the Z-axis, meaning you the effect starts to breaks down on severe slopes, exposing the component colors.
Another challenge, which I think is more to do with multicolor slicing logic than how this new feature works, is how color blocks that penetrate the model can interfere with the effect – lighter color mixes in front of dominantly-colored internal boundary walls, for examples.
Common sense dictates that the best results will come from printing with finer layer heights. Ratdoux confirmed this, telling me “thinner layers generally improve blending, and more transparent or translucent filaments also improve blending. Thicker, more opaque layers reduce that effect and make the alternating structure more visible.”
I haven’t printed larger objects at larger layer heights, but I should imagine it’s a surprisingly forgiving effect at a distance. As long as you don’t get too close, you won’t notice.
Where Can This Go?
This kind of layer stacking technique lends itself to toolchanging or nozzle-changing printers. Depending on the complexity of your print, you are calling on the printer to change material for every single layer where a color virtual color is used. For light usage, it’s probably no worse than a moderate color print using a filament changer. But be in no doubt, a toolchanger like the Snapmaker U1 or Prusa XL is where this shines; like with any kind of multicolor printing, not needing to withdraw and purge is a big material and time-saver.
“I’d say the basics are finished since it is currently usable, but there’s still quite a bit of work left to do!” says Ratdoux. “Apart from bugfixes, there’s the local z-dithering feature that requires some extensive work… Instead of using only full layers in a simple fixed alternation, the slicer varies the layer heights within mixed regions so it can hit more precise material ratios. In plain terms, it can give one filament a thicker share of the vertical stack and the other a thinner share, which makes the apparent blend more controlled and more accurate.”
Where Did This Come From, and How Can I Use It?
The idea of alternating color layers to produce all new hues is not a new one – examples have appeared in various 3D printing forums over the years. What set the ball rolling for Full Spectrum was a thread by Redditor Aceman11100 who also working on a similar solution. Theirs is a slicer- and printer-agnostic version of the same idea, currently in development “with some polish left to do,” they tell us. Ratdoux’s Snapmaker-oriented (but not exclusively so, to clarify) surged ahead and is downloadable and usable now from GitHub on Windows, Mac, and Linux devices.
I tested this out on Windows. Those intimidated by GitHub needn’t be in this case – downloading the appropriate installer and running it should be enough. Mac users may need to allow it through their system security settings – it’s an unsigned app and will likely trigger warnings.
The project’s page stipulates that it hasn’t been officially tested on any hardware – the work done was theoretical, but sensibly feasible. Snapmaker has since picked up on the project and shipped a U1 to Ratdoux to continue the work. Given that it’s basically Orca Slicer under the hood, perhaps we’ll see this color-mixing method ripple its way upstream to the parent slicers, too.